Guide to Successful Rigging…and Unrigging
(This page is provided by http://www.windvisions.com/)
Rigging a windsurfing sail properly is more important than many realize, especially newcomers to the sport. While it is the engine from which we harness wind energy, it needs to generate that energy properly, efficiently, and comfortably. An improperly rigged sail will not only generate less power but it will take more energy from us to make it work, which results in a reduced fun factor – what we’re all here for.
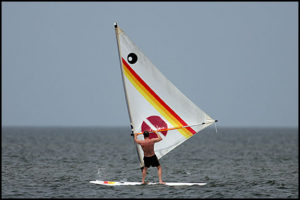
A not-so-modern sail
Modern windsurfing sails have come a long way since the sails of the 80s and before. While the pretty colors of Dacron have given way to the relative colorlessness of monofilm and scrim, the performance gains have been truly remarkable. The newer sails are lighter, they allow you to plane up much quicker, sail with much more ease than ever before, and cover a much wider wind range. With only three sails for example, I can plane comfortably in winds ranging from 15 to 35 knots. The main drawback of the newer sails is that they are usually less durable than the older ones. But with a little basic care, even the new sails will last several years.
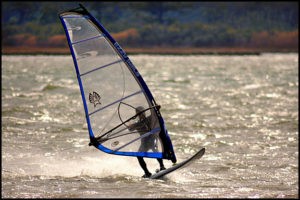
A modern sail – Guess who’s having more fun and using less energy in the process
Before you get started
Make sure you have the right mast, base extension, and boom for the sail. All masts are not created equal. Just because your sail calls for a 460cm mast with an IMCS (luff curve rating) of 24 does not mean that your mast with the same specs is the correct mast. It will fit, but that does not guarantee that it will perform properly. Most mismatched masts will work satisfactorily but those that do not usually perform so poorly that you will have problems out on the water getting powered up, staying upwind, and being able to handle a wide range of wind speeds. Most sails will specifically tell you which mast they recommend. Your local shop or a more experienced sailor should be able to help you with this.
Rigging
Lay the sail out on a flat surface, preferably grass. Sand will work fine but you will end up getting sand inside your luff sleeve. It will end up there eventually but there is no need to invite it. Hard pavement is to be avoided since it abrades the sail material and it rough on carbon components.
Placing some clear packing tape over the joint between the top and bottom pieces of the mast will make rigging easier by keeping your secitons from separating, it will help keep sand out of the joint, and will make unrigging easier by keeping the pieces together. You can get clear packing tape at most hardware stores. It also doubles a sail repair tape.
Run the mast all the way to the top of the sail, being careful not to crease the panels or drag the mast on any hard surfaces which might abrade, chip, or ding it. This is where the skinny masts come in handy. They slide in so much easier. While doing so, feel for the joint to make sure your mast has not separated as this could cause mast breakage and will definitely affect your tuning.
If your mast is too short for your luff, make up the difference with your mast base extenstion. Start off by using the specifications usually printed on the sail.
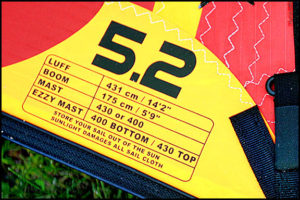
Sail specifications
If your sail calls for a luff length of 472cm and you have a 460cm mast, simply make up the difference by adding 12cm to the length with the base extension. Since most extensions are adjustable in one inch or two cm increments, just go to the closest location. You can make minor adjustments once you’ve gotten it completely downhauled.
In some cases, you may have more mast than you have luff, in which case you will set your extension at its shortest setting. In fact, you will have to effectively lengthen your luff. Almost all sails in 6.5 and smaller sizes come with adjustable head straps. Simply loosen the headstrap until your luff is long enough for your mast. Try to make sure that if you have to lengthen it at all, that you do it all at the top rather than some at the top and some with your base extension. It’s pretty important to make sure that your sail is as close to the bottom of your mast as possible.
There are a number of ways that people will rig, especially dealing with camber inducers. For many years, and especially now that I’m using reduced diameter masts and I’m not using camber induced sails, I have always simply threaded the mast up the luff sleeve (through the camber inducer(s) if applicable) and downhauled to the correct setting before installing the boom. Others will thread the mast but add the boom and outhaul to the max before adding any downhaul or snapping the cambers into place. I don’t think it matters which you do but I prefer not to stress the seams in my sails by adding so much outhaul before the sail is completely down on the mast.
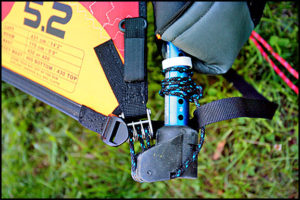
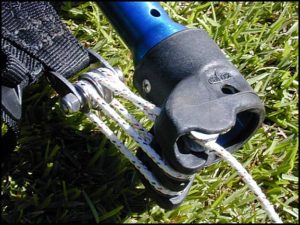
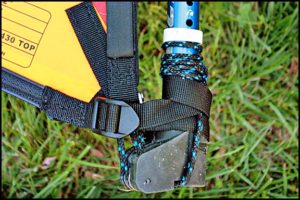
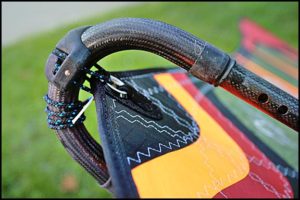
When downhauling, make sure that your tack pulley is all the way to the bottom of the base pulley. The idea is to get your sail as close to the deck as possible. If you have a tack strap as in the photo below, wrap it around the mast ir the base and cinch it tightly (4th picture below) until the sail area in front of the strap starts to crinkle a little. This moves the draft of the sail down a little and makes it deeper in the bottom. This gives the sail a little more bottom end power and reduces some of the top heavy feel.
Proper downhaul. Get your sail as close to the deck as possible
If you can downhaul with your bare hands then you are not getting enough. If you have one of those colorful, plastic downhaul tools that are still floating around these days, please throw it away and get an aluminum cleat since when the plastic one breaks, it will leave a razor sharp edge that’s probably going to slice you open.
Aluminum downhaul tool (tug cleat)
You may want to allow about 2cm of adjustment should you decide to add some downhaul later.
Allowance for more downhaul
My sails have such a wide range and are mainly tuned by outhaul that I just downhaul to the same spot everytime and do not allow for any more later.
Start off by setting your downhaul by the specifications but be aware that not all base extensions are marked the same. Once you are set, look at the sail to see if you have the correct shape. Most sails these days have markers printed on the upper panels to give you an indication of proper shape.
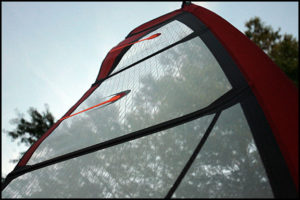
Downhaul indicator in second panel, showing proper amount of downhaul
Typically you want the top couple of panels to be a little bit loose even though it may not look “right”. Rest assured that once the sail is fully powered up and the mast starts to flex, those panels will “look” right to the wind. Some older sails liked to be rigged with a tight leech but modern sails are designed to be loose at the top. Once your downhaul is set, secure any extra line around the base extension so that you do not step on it while sailing.
Store your excess downhaul line properly
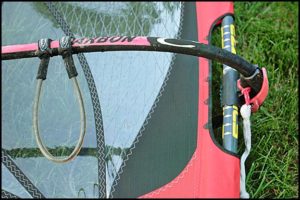
Attach your boom and clamp it firmly in place at about shoulder height when the mast is in place and vertical on your board with you standing on the deck. This is a good starting point. It is very important that you have a snug fit so that your boom does not slip or twist while you sail.
Adjust the length of your boom according to the specifications. Again, this is not always very accurate. A good rule of thumb is to set it such that when fully outhauled, the sail panel does not quite touch the cente of the boom arm when you press down lightly. You can slack it off or tighten it up from there. I rarely sail with less outhaul than this but often add more as the winds pick up.
Keep your boom as short as possible to keep your rig stiff and responsive
Make sure that the clew of your sail is maxed out on your boom as this will greatly reduce the movement of your boom and help make it feel much stiffer.
Tuning
If you have followed the above instructions, your sail should be rigged pretty close to its maximum potential. Once you are out on the water you can make fine adjustments to suit the winds or your personal style. Generally, if you have too much power you can add downhaul (1cm increments) to help depower the sail. You will have to add some outhaul at the same time since adding downhaul makes the top and the bottom of the mast come closer together, making the center of the sail effectively looser. Most sails will need some downhaul and outhaul as the winds pick up while modern Ezzy sails require only outhaul.
If you have adequate power but notice that you are pulling more with your front arm than your back arm while completely weighted in your harness, you need to either move your harness lines forward (in 1/2″ increments) or add some outhaul. Adding outhaul will flatten the sail a little but it will also move the draft forward. It may take a while to determine exactly where you want to keep your harness lines. Properly set on a properly rigged sail, your harness lines really should never have to move unless you use that same boom on a different sail.
Harness lines close together
If you keep your lines really close together you will get a better feel about whether or not they are located properly. Some people like to keep them about shoulder width apart and slide forward and aft along them as the gusts come and go but with a modern sail properly rigged, there should really be only one balance point since the newer sails have such a stable draft built in. Ideally, you should be able to sail with no hands at all, at least for short periods of time, with the feeling that the sail is in perfect balance and you should be able to sail even in strong winds with minimum touch from your hands. You should never have to grip the boom very hard while just sailing straight in steady winds.
There are other variables to getting the perfect board/rig balance but they include lots of other aspects such as water conditions, board size and type, sailor height or lack thereof, and whether or not you have an adjustable outhaul. By following the above guidelines however, you should be able to get your rig into near-perfect trim.
Unrigging
Unrigging is pretty straightforward. Just reverse the process. Undo the outhaul and remove the boom, pop the downhaul and remove the base extension and mast. Try not to allow the sail to flop in the wind or you will get permanent creases in the monofilm which will eventually crack open. Do NOT remove the battens. Some windsurfers who started as sailors try to remove the battens. Typically they are set properly at the factory and only need a little tweak after a few sessions if at all and never need adjustment afterwards. Make sure you store the sail in its bag, either flat or with the luff down otherwise you will crinkle the panels near the clew.
Some people who sail in salt or brackish water prefer to rinse their sails after a session. This is not necessary and unless you get it completely dry after a fresh water rinse, you will start to grow mildew very quickly. It is prefectly ok to put your sails away even dripping wet with salty water. Rinsing or even unrigging in the water does help rinse off sand which can abrade your sail over time. I usually just let my sails dry in the air after a session and put them up while still damp.
Related items
Downhaul line:
There are many personal preferences with downhaul/outhaul line. I prefer the line that comes on the Chinook booms. Many shops carry it on spools. You can see it in the pictures above. It’s prestreteched and is the right size for most boom and base extension cleats. I cut mine in 4-foot lengths and always have a couple of extra lengths for when I break one…and they will break which reminds me…check all your lines regularly for wear. Line is cheap and it’s not fun to get caught out on the water when one breaks.
Some people prefer Kevlar-based line, especially for the big race sails that take so much downhual tension. It is very hard to hold this line by hand because it is slippery and it bites into your hand but it does the trick for the race crowd.
Pulley hook:
If your sail does not have an integrated pulley as seen in the pictures above, you will appreciate a pulley hook. It simply hooks through the grommet at the tack of the sail and it will make dowhauling so much easier. It will especially keep your lines from crossing over one another and getting in a bind. They come in three or four pulley varieties.
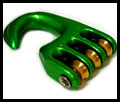
Typical pulley hook
Mast base extension/mast base/U-joint:
Again, a lot of people have their own preferences here. For simplicity, I have one base extension for each of my rigs so I don’t have to remember where I have then set, plus I can rig more than one sail at a time.
There are three main types of U-joints, only one of which is really a U-joint. The others are the tendon and the rubber hourglass as shown below. The rubber hourglass is the most common because it is the cheapest but it’s also the least reliable. I highly suggest getting either the tendon or the U-joint since they last so much longer. The true U-joint is great for wide boards because it alows you to attach the rig without having to roll the board over on its side. All but the U-joint have the retention strap. These can be a literal lifesaver should your joint fail. At least your rig and board will still be connected. The U-joints do not have them since they are so durable. I have only seen one fail and it was due to a defect.
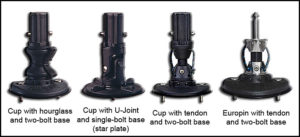
A variety of mast bases
I cannot stress this enough. Check your joints regularly for wear. When they fail, getting back home can be torturous. Ask any seasoned sailor about his broken U-joint experiences since it happens eventually if you sail enough. Most will have interesting stories to tell. Like the downhaul and outhaul lines, joints are pretty inexpensive and good insurance.
There are different means of connecting the joint to the base extension. In the figure above the first three use a cup while the last uses the Europin. There are a couple of different cups out there which are interchangeable with a slight modification. There are other pins out there as well but interchangeablility is not guaranteed.
This figure also shows two different ways of attaching the base to the board. The single-pin is the most common, again because it is the cheapest, and the two-bolt which is the most durable and features a quick-release so that you can change rigs, leaving the low-profile base on your board permanently.
Mast base pad:
Mast base pads wrap around the base of your mast to keep the deck of your board from taking hard impacts from the mast. Many sails these days have them built into the sails, reducing the need for extra pads.
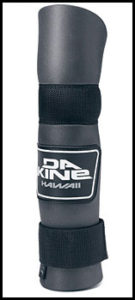
A typical mast base pad
Booms:
There are lots of different booms out there these days. I’d suggest talking to others at the
beach to see who likes what. There are many variations of heads/clamps, tail pieces/cleats/pulleys, and adjustment systems and they change often. A good boom will serve you well and it doesn’t have to cost a lot of money. Carbon booms are expensive and are only really useful with sails about 6.5 and larger. Booms for smaller sails just don’t get any weight or stiffness advantage. The real advantage to carbon is the stiffness you can get without having to go to thick-walled aluminum.
Boom bra:
Like the mast base pad, the boom bra helps protect the deck from the boom head crashing onto the nose of the board.
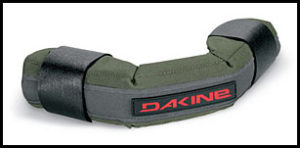
A typical boom bra
Uphaul:
An uphaul is an essential item. I sometimes call mine an around-haul since I waterstart most of the time and really only use mine for pulling the mast around while setting up for a waterstart. I would suggest getting one for each boom and leaving them installed permanently. I’ve seen too many people get out on the water only to notice that they have left their only uphaul on their other boom.
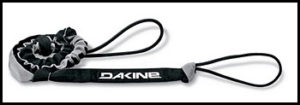
A typicial uphaul
Many people have one or two masts and one or two booms for all of their sails. I have three masts, three base extensions, and three booms, one for each of my three sails. This allows me to rig two without having to break another down. But more importantly it allows me to keep all my base, boom length, and harness line settings the same. Aside from being convenient, it allows me to get the right settings for each of my rigs and never have to worry that something is not tuned properly. That way I can just rig and sail.